Dreaming of creating a font? 3 steps to start from scratch

I want to dedicate a little section of my blog to font creation education. Since 2015, I’ve been enjoying my journey through font creation, and it’s been a long and satisfying path. At the very start, I searched everywhere I could to find anything online related to creating fonts, and it was almost impossible to find valuable and educational content on this topic. It seemed like it was taboo, or that nobody was interested in sharing the how-to when designing professional fonts. I’ve found a couple of articles and tutorials, but it’s remained a confusing and cloudy topic on the internet. So I’m setting out to change that up here on my blog!
As a self-taught typographer, I attended a couple of online and in-person workshops, but none of them gave me everything I needed to know about creating fonts. I was grabbing bits of information here and there, researching it, and then putting all of my new knowledge together in practice.
If you’re reading this, you may be curious about what the first steps would be in creating a font. You’re in luck! Here I’ll share three principles for creating fonts, and how you can begin to get familiarized in this brave new world. Because, yep my friend, we have to start somewhere!
The Font Editing Software
There are so many apps, software programs, and plugins that will promise you the creation of a font from your handwriting in a heartbeat. I’ve tried a couple without success. The thing is that if you’re looking to develop professional and profitable fonts you can’t rely on those software or plugins. You need something excellent to develop your font and make the most of it.
The best application to create fonts from my perspective is GLYPHS. It’s super easy and friendly to use, but I have to point out here that it’s for Mac users only. When I was looking to create my first font, I spent a lot of time searching for an user-friendly software that allowed me to use my hand-lettering to create a font system. Glyphs has been the only tool that has allowed me to do that with a smooth creative experience. I have to admit that being a first-time user of the app can be overwhelming at first, but with a little guidance and research, I was able to get familiar with the app and play around confidence learning how to use it.
If you want to learn how to make fonts, definitely get familiar with Glyphs. You can select a 30-day free trial of the software so you can play around before purchasing it. There are two versions: Glyphs Mini 2 and Glyphs 2. The difference is in the features and advanced options you have when creating and exporting the fonts. An excellent way to begin is using the Mini version and then upgrading to the full version later. In my case? I use the version Glyphs 2 to be able to support multilingual and web fonts.
The importance of the Media
When I was about to get started creating fonts, I was so thrilled to know that I could generate something organic like hand-lettering and make it a font! I needed to draw all the characters, then scan them, and then prepare every single character before bringing them down to the font editing software. That process made the whole experience feel more organic and valuable.
You may already have a favorite tool in which to tackle your hand lettering or creative projects. So making the time to get inspired and explore through your medium is a good way to begin thinking about your first font. You can use pencils, brushes, markers, and tech tools like the iPad Pro, or software like Procreate or Adobe Illustrator.
For instance, I love doing calligraphy and hand-lettering using brushes and markers, so creating alphabets and symbols using the tools I’m most familiar with was a good way to start exploring the letters.
The Ipad Pro in combination with the Apple Pen have become my go-to tools when creating fonts. For drawing, I use Procreate. I love the way I can draw and redraw every character until I get the perfect one that fits with the entire font system, and it makes me stick to these tools (and app!) over and over again. By the way, I’ve created my own Procreate brushes for lettering in case you want to try them out for free, but I have to warn you: you won’t be able to stop playing with them!
Also, you can try creating your letters in Adobe Illustrator if you want to achieve a look that’s less organic than hand-lettering. Nowadays the possibilities are endless, and the sky is your limit! Part of the process when creating a font is getting familiar with your artistry and your specific artistic tools as well. Keep in mind that the best way to create your letters is by drawing them in high contrast, and for that, I recommend using black color for your letters over a white surface. This way it’ll be easier to vectorize the characters for the editing software.
The characters:

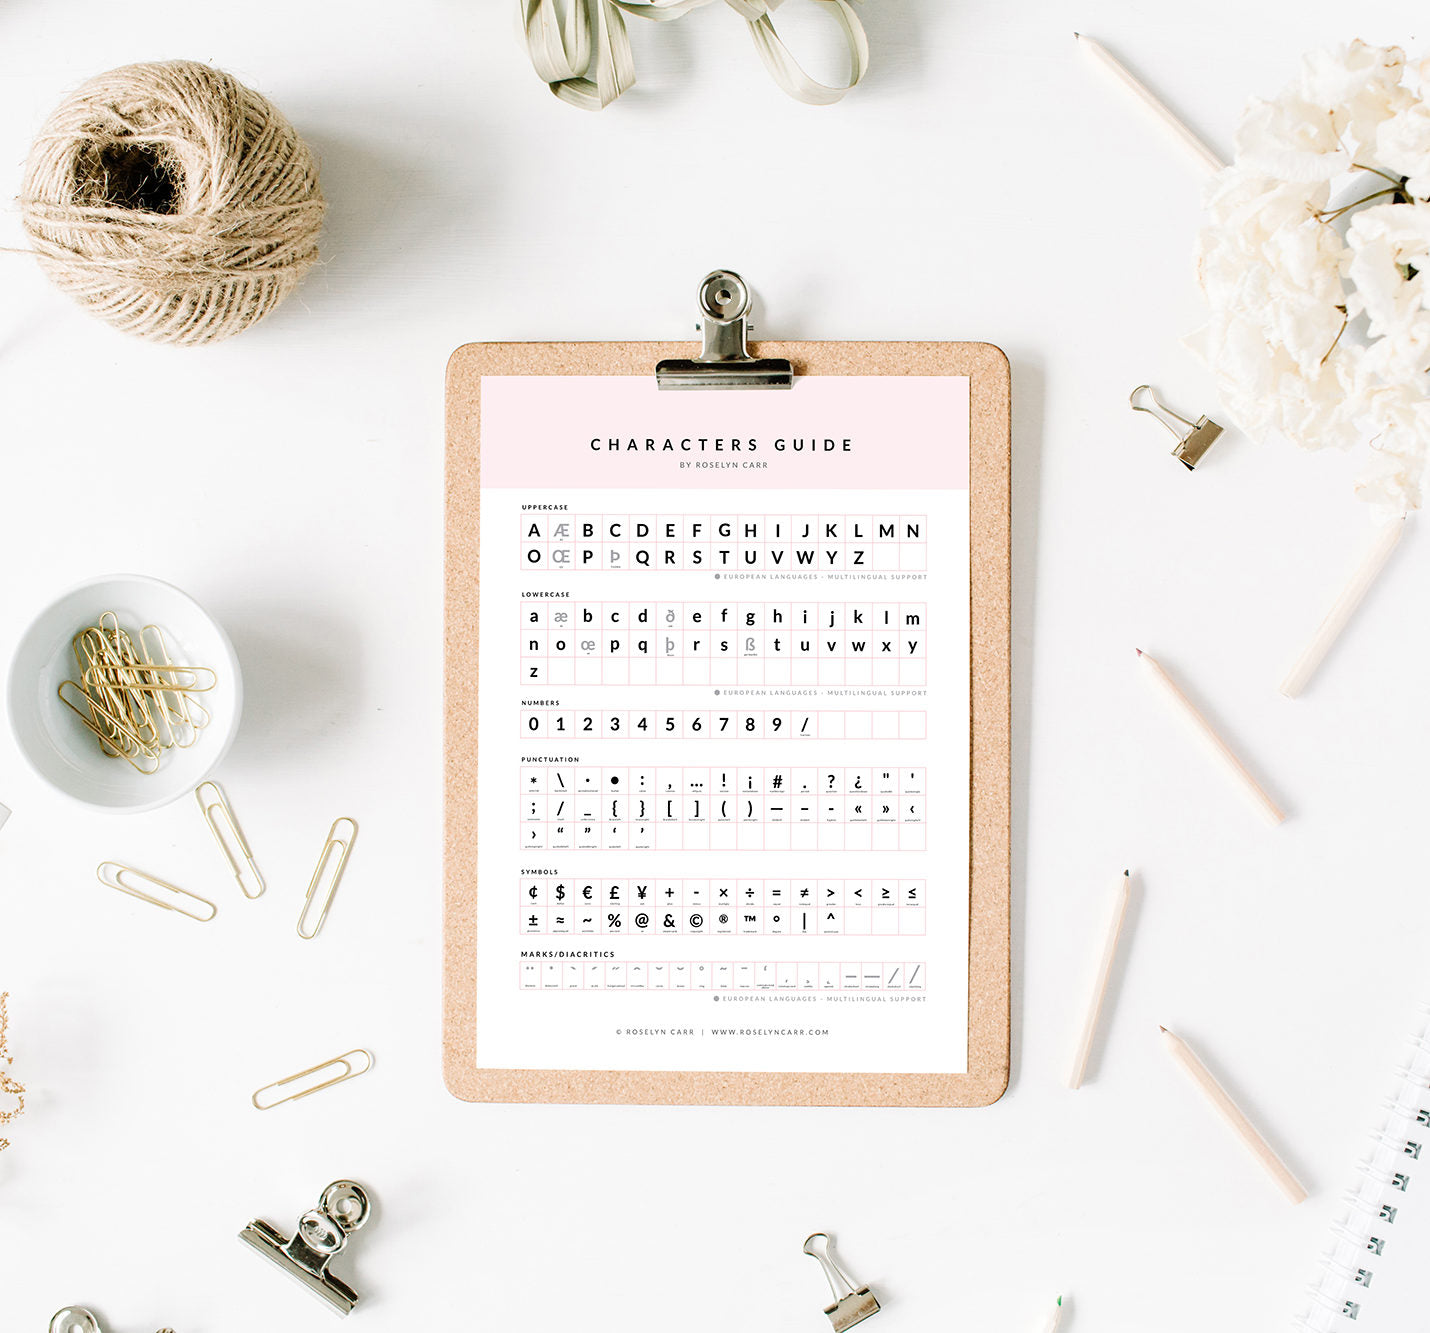
The characters of a font include way more than those 26 letters of the alphabet! If you want to become a font designer, you have to know that a font is a complex system that includes more than the letters of the alphabet. Besides the uppercase and lowercase letters, you must include numerals, symbols, punctuation, marks, and even characters you may not be familiar with included in other languages. For that, I created a glyphs guide for you to get familiar with these new shapes so you can play around drawing them in different styles.
GET MY FREE CHARACTERS GUIDE
I wish I knew the importance of these three topics back when I was first starting out in font design. And I really hope they make a difference for you in your creative journey!
I’d like to know more about you, and what you would like to know about font designing, so please leave a comment below. What would you like to know about making fonts? And what are your struggles in the process?
RELATED: HOW TO CREATE A BRAND BOARD + FREEBIE
PIN IT FOR LATER


